Ad. When you purchase through links we provide, we may receive an affiliate commission. Here's how it works.
Robot Vacuum Maintenance Schedule: Daily to Monthly Guide
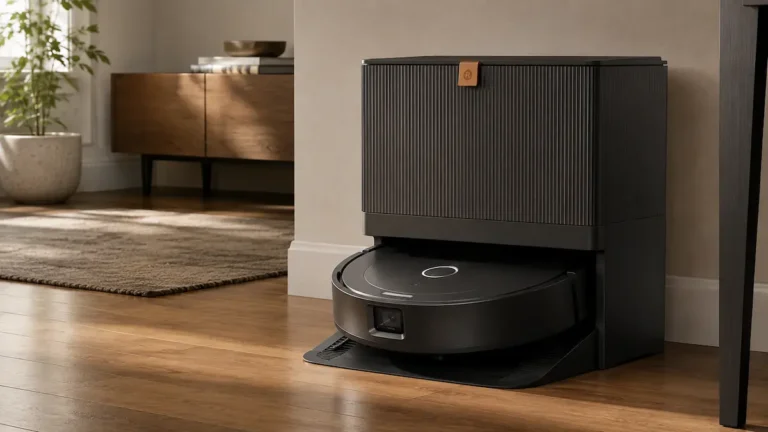
TL;DR: A solid robot vacuum maintenance schedule means checking rollers and sensors after every run, emptying the bin and wiping the charging contacts weekly, and washing filters and mop pads monthly.
Skip it, and you’re not just losing suction, you’re risking dander buildup, scuffed hardwood, and a robot that dies years early.
What You’ll Need
Before you start, gather these. Most robot vacuums ship with a couple of these tools in the box, but a few upgrades make the job faster.
- Tools (required): the plastic cleaning tool that came with your robot (usually a comb-and-brush combo), a microfiber cloth, and a pair of scissors or a seam ripper for cutting tangled hair off the roller
- Cleaning supplies (required): isopropyl alcohol (70 percent) for sensors and charging contacts, and a soft-bristle brush (an old toothbrush works)
- Replacement parts (as needed): a spare HEPA filter, a spare side brush, and a spare main roller, depending on your model’s replacement intervals
- Optional but useful: compressed air for blowing debris out of tight sensor housings, and a small parts tray so you don’t lose screws or brush pins mid-cleaning
Robot Vacuum Maintenance Schedule: Step-by-Step
Picture three different households.
One has a shedding dog and a toddler who tracks in backyard debris.
One has a homeowner who works 60-hour weeks and wants their floors clean without becoming a second job.
One has freshly refinished engineered hardwood and zero tolerance for scratches.
All three need a robot vacuum maintenance routine, but the emphasis shifts depending on which one you are.
Here’s the full schedule.
1. After every run: quick visual check (30 seconds)
Glance at the roller and wheels before the robot heads back to its dock.
Hair wraps around rollers fast, and a tangled roller is the single most common cause of a robot that suddenly loses suction or stops mid-cycle.
- Pet-owner: do this after every run, not every few runs.
Shedding dogs and cats can wrap a roller tightly enough to stall the motor in a single cleaning cycle. - Busy-professional: if you truly don’t have 30 seconds daily, at minimum glance at the robot on its dock once a day as you walk past.
Visible hair strands poking out from the roller housing is your cue to act that day, not next week.
2. Weekly: empty the bin, clean the roller, wipe charging contacts
This is the core of any robot vacuum maintenance schedule, and skipping it is the most common way people end up with a robot that “just stopped working” a year in.
If you’re running a model with a self-emptying base, our guide to the best self-emptying robot vacuums covers how different dock designs handle this step.
- Empty the dustbin.
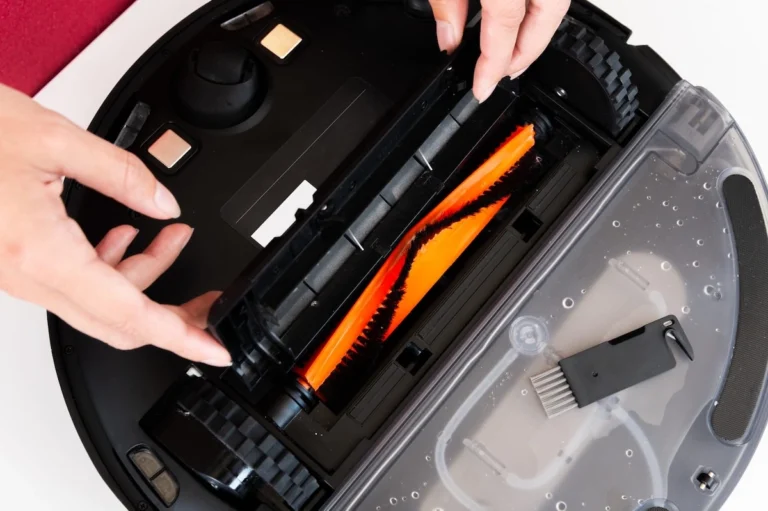
Even models with self-emptying docks need the dock’s larger bag checked periodically, since a full bag stops the transfer process silently. - Remove and clean the main roller.
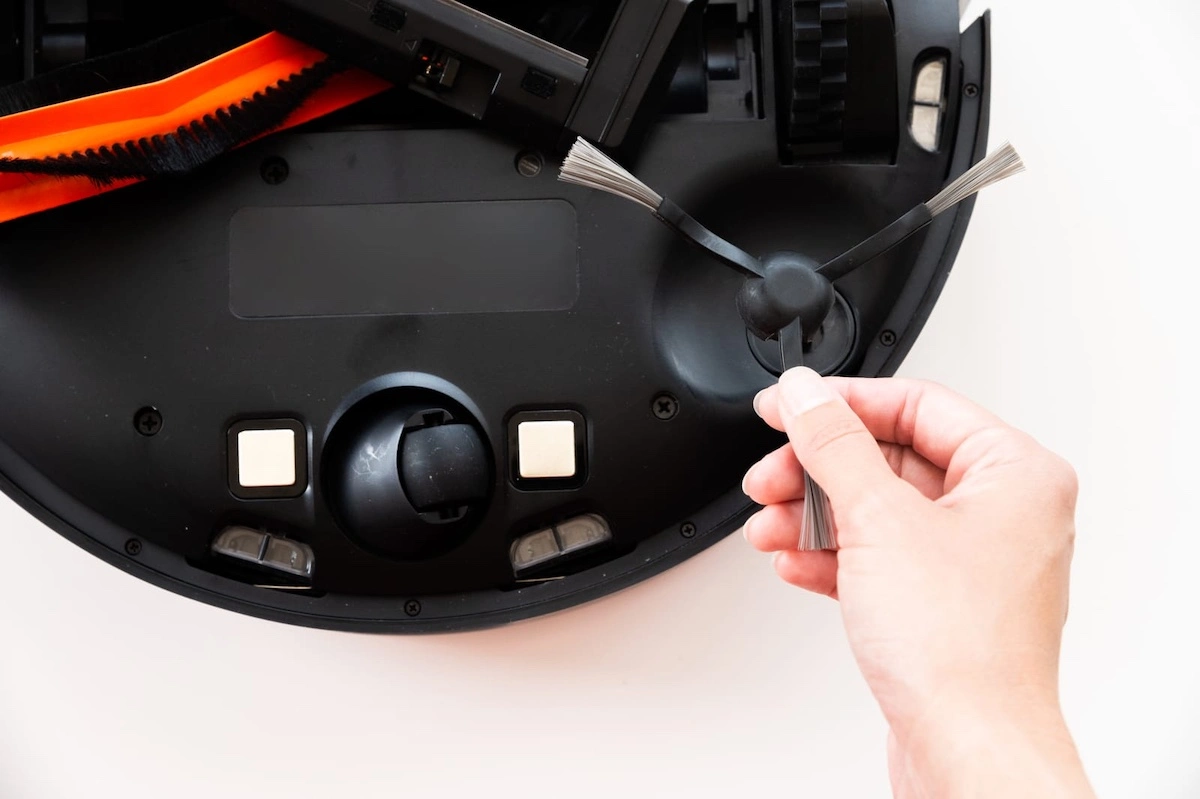
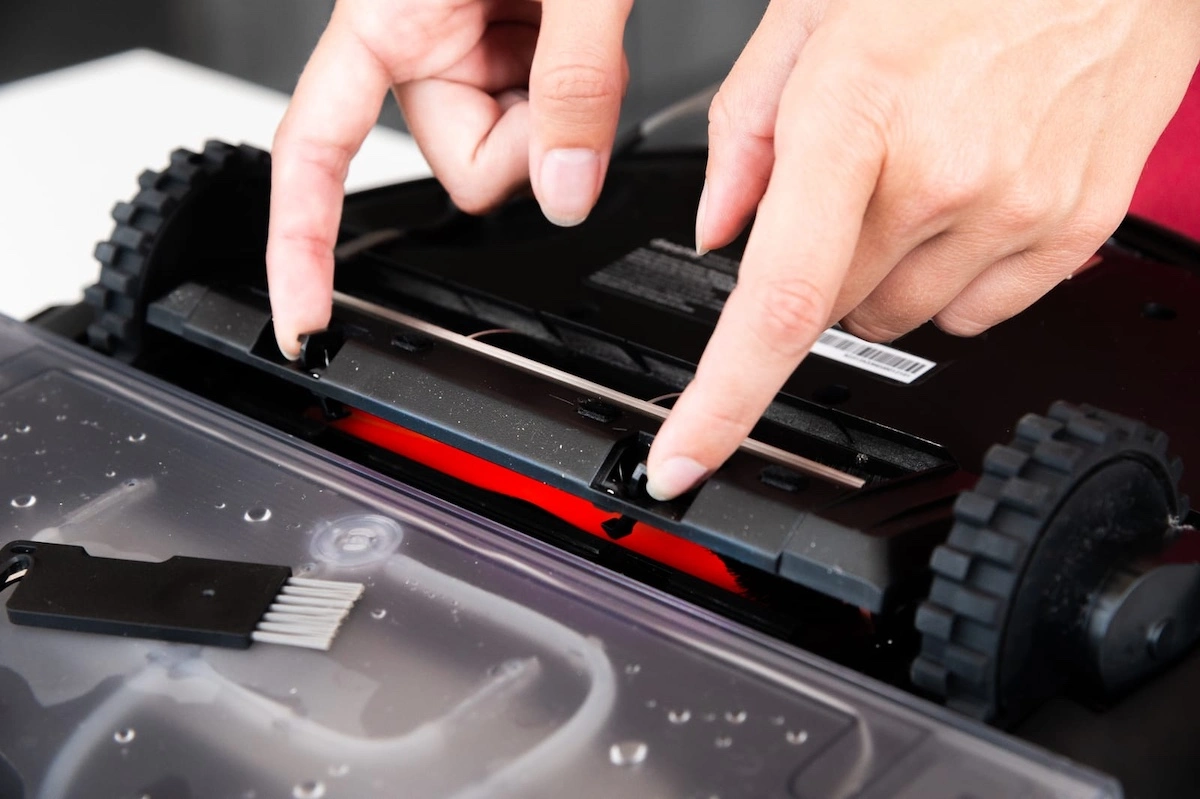
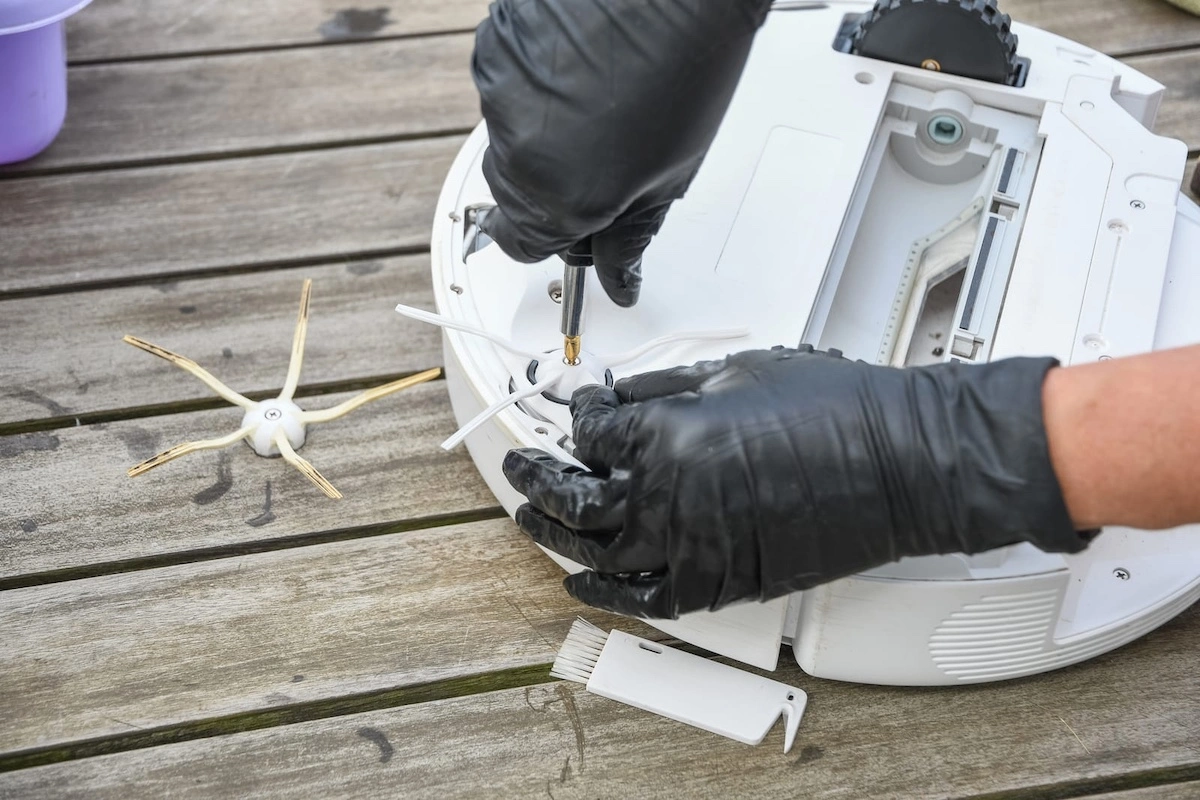
Cut tangled hair away with scissors, working along the length rather than yanking, which can bend the brush bristles. - Clean the side brushes.
Pull hair and debris from the base of each bristle where it wraps around the mounting pin. - Wipe the charging contacts on both the robot and the dock with a dry cloth or one lightly dampened with isopropyl alcohol.
Dirty contacts are a common, overlooked reason a robot shows as “charging” but never actually reaches full battery. - Wipe down sensors and the front bumper with a dry microfiber cloth.
Dust film over a cliff sensor or camera is a frequent cause of a robot that suddenly refuses to dock or gets stuck near stairs.
- Pet-owner:
During shedding season (typically spring and fall), move this to twice a week.
Dander, not just visible hair, is what accumulates in the bin and filter between cleanings, and that matters more for allergy sufferers than hair volume alone. - Premium-floors:
Pay close attention to the wheels during this step.
Hair and grit packed into the wheel wells is what actually causes floor scuffing, not the weight of the robot itself, so a wheel caked with debris is dragging abrasive material across your finish on every pass.
3. Monthly: wash or replace the filter, deep-clean the mop system
This step gets skipped more than any other in robot vacuum maintenance, largely because the filter looks fine from the outside even when it’s badly clogged.
If you’re shopping for a hybrid model, our best vacuum-mop combo guide covers which mop systems are easiest to keep clean.
- Check your filter type before touching it.
Washable filters can be rinsed under cold water and air-dried fully (at least 24 hours) before reinserting.
Non-washable HEPA filters should never touch water. - Replace non-washable filters roughly every 2 to 3 months under normal use, sooner if you have pets or run the robot daily.
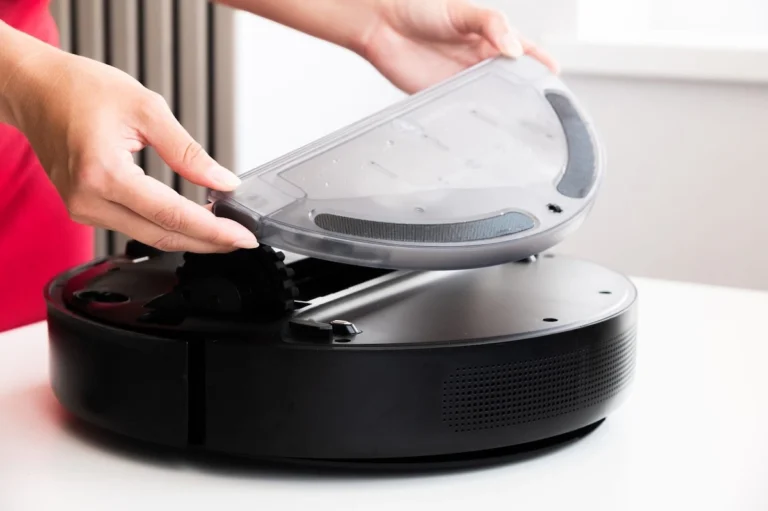
- Remove and rinse mop pads or cloths if your robot has a mopping function.
Let them fully air-dry before the next cycle, since a damp pad left in the dock breeds odor and mildew. - Empty and rinse the clean-water and dirty-water tanks on hybrid vacuum-mop models to prevent mineral buildup and mold in the reservoirs.
- Wipe down the entire dock, including the debris-collection port, with a dry cloth to prevent dust from recontaminating a freshly emptied bin.
Busy-professional: this is the one monthly task worth protecting on the calendar, even if you skip a few weekly steps.
Set a recurring 15-minute reminder on the same day each month, ideally paired with something you already do, like paying bills.
Premium-floors: a neglected mop pad or leaking reservoir is the fastest way to cause moisture damage on hardwood or laminate.
Standing water left by a worn or dirty mop system can seep into seams and cause warping that no amount of later cleaning reverses.
4. Quarterly: inspect wheels, wear parts, and firmware
Every three months, take five minutes to check the parts that wear down slowly and get overlooked.
This step rounds out a complete robot vacuum maintenance schedule, even though it comes up far less often than the weekly and monthly tasks.
- Spin each wheel by hand and check for hair wrapped around the axle, which restricts movement and can throw off navigation.
- Check the main roller and side brushes for wear.
Flattened or missing bristles reduce pickup even after cleaning, and replacement is cheaper than the extra passes a worn brush forces the robot to make. - Update the robot’s firmware through the manufacturer’s app if an update is available.
Firmware updates frequently improve navigation accuracy and battery management. - Inspect the battery health if your app reports it, and note whether run time has meaningfully dropped from when the robot was new.
Why This Works
Robot vacuums fail gradually, not suddenly, and the maintenance schedule above targets the exact points where that decline starts.
A full bin or a clogged filter reduces suction well before the robot ever throws an error or a low-battery warning, which is why performance loss often feels random when it’s actually predictable.
The International Electrotechnical Commission’s standard for vacuum performance testing (IEC 60312-1) is built around exactly this: airflow and pickup efficiency are measured through the whole air path, filter included, because a restricted path degrades performance long before it’s visible.
For more on how suction is measured and why it drops, see our explainer on robot vacuum suction power.
The same logic applies to allergens.
Research on indoor allergen control consistently finds that frequent, consistent vacuuming outperforms occasional deep cleaning for keeping dust and dander levels down, because allergens resettle into carpet and upholstery between infrequent sessions.
A robot vacuum that runs daily but drags a clogged filter is doing the opposite of what you bought it for: stirring allergens back into the air instead of removing them.
Common Mistakes to Avoid
Even a well-intentioned routine can go sideways.
These are the slip-ups that undo good robot vacuum care fastest.
- Washing a non-washable HEPA filter.
People assume any filter can be rinsed clean, but water breaks down the dense fiber structure that traps fine particles.
A washed non-washable filter can look perfectly clean while its actual filtration ability is permanently reduced.
Check your model’s manual before you run it under the tap, and replace instead of wash if it’s not rated for water. - Letting mop pads sit wet in the dock.
A damp pad left in a closed dock overnight is exactly the environment mildew needs.
Pull mop pads out and air-dry them separately after every mopping session instead of leaving them attached. - Ignoring the dock, not just the robot.
Self-emptying docks and charging bases collect dust in the debris port and on the charging contacts.
A dirty dock can silently fail a transfer cycle or a charge cycle while the robot itself looks fine. - Waiting for a problem before checking wheels.
By the time a caked wheel is causing navigation errors, it’s often already been dragging grit across your floors for weeks.
Check wheels on the same schedule as the roller, not only when something goes wrong. - Treating maintenance as a one-size-fits-all monthly chore.
A household with pets, kids, or premium flooring needs a tighter interval on specific steps, not just “more cleaning overall.”
Match the schedule to your actual household, not a generic default.
Safety & Maintenance Tips
Safety:
- Unplug the robot or remove its battery access before cutting tangled hair off the roller to avoid an accidental motor engagement while your fingers are near the blades or bristles.
- Use isopropyl alcohol in a ventilated space and let it fully evaporate before docking the robot, since residual alcohol near charging contacts is a fire risk in rare cases.
- Keep replacement filters and small parts (screws, brush pins) away from young children and pets, as several are small enough to be a choking hazard.
Maintenance habits:
- Log the date each time you replace a filter, roller, or side brush so you’re going by actual usage instead of guesswork.
- Set a recurring monthly calendar reminder for the filter and mop-system deep clean specifically, since it’s the step most often skipped.
- Keep a small spare-parts kit (filter, side brush, roller) on hand so a worn part gets swapped immediately instead of sitting on a to-do list for weeks.
Which Maintenance Routine Is Right for You?
- If you have a shedding dog or cat → move weekly roller and bin cleaning to twice a week during shedding season, and check the bin daily for the first week to gauge how fast it fills.
- If you’re short on time → protect the monthly filter and mop deep-clean above everything else, and let the daily visual check slide to a few times a week instead of daily.
- If you have premium or engineered hardwood → inspect wheels and the mop system every week, not monthly, since debris-caked wheels and leaking reservoirs are the direct cause of scuffing and moisture damage on delicate finishes.
- If your robot has a self-emptying dock → don’t assume “self-emptying” means “no maintenance.”
Check the dock’s larger bag monthly and the debris port for dust buildup, since a clogged port can cause silent transfer failures. - If you just noticed reduced suction or streaking → skip ahead to the weekly and monthly steps immediately rather than waiting for your next scheduled cleaning, since a clogged filter or dirty mop pad is the most likely cause.
- If you’re new to robot vacuums entirely → start with the weekly routine only for the first month, then add the quarterly wheel and firmware check once the weekly habit feels automatic.
How We Developed This Guide
We reviewed manufacturer maintenance documentation across major robot vacuum brands and cross-referenced vacuum performance standards from the International Electrotechnical Commission.
We also consulted indoor allergen research to ground our pet-owner and air-quality guidance in solid science.
This approach relies on independent, non-commercial sources rather than manufacturer marketing claims.
For our full method and scoring rubric, see our review methodology.
Frequently Asked Questions
How often should I clean my robot vacuum if I have pets?
If you have a shedding dog or cat, keep the standard weekly bin-and-roller cleaning as your baseline, then move to twice a week during spring and fall shedding seasons when hair volume roughly doubles for most breeds.
The reason isn’t just tangled hair, it’s dander.
Pet dander is a fine particulate that settles into the bin and filter between cleanings, and the Asthma and Allergy Foundation of America identifies frequent removal of pet allergens from the home environment as one of the most effective control measures for allergy sufferers.
A practical example: a household with one shedding Labrador typically needs the roller cleared of hair every 3 to 4 days during shedding season, versus every 7 to 10 days the rest of the year.
If anyone in the household has pet allergies, pair this with emptying the bin outdoors rather than indoors, since opening a full bin indoors releases trapped dander back into the air you’re trying to clean.
Our direct recommendation: stick to the weekly cleaning step year-round, but block twice-weekly slots on the calendar for shedding season in advance rather than waiting until the bin fills faster than expected.
What’s the minimum robot vacuum maintenance routine if I don’t have much time?
The true minimum-viable routine is one 15-minute monthly session covering the filter and mop system, plus a 60-second weekly check of the roller and bin.
Skip the daily visual check if you genuinely can’t spare it, and skip the quarterly firmware and wheel inspection if time is extremely tight, since those are the two steps with the longest runway before they cause a visible problem.
For example, a professional running the robot on a daily schedule with no manual checks at all will typically start noticing reduced suction or streaking within 6 to 8 weeks, right around when a neglected filter clogs enough to matter.
Research on indoor allergen and dust control generally supports a “little and often” approach over infrequent deep cleaning, meaning the short weekly check is worth protecting even when everything else gets compressed.
Our recommendation: if you can only commit to one habit, make it the monthly 15-minute filter and mop session, since it prevents the failure that’s hardest to reverse.
Can neglecting maintenance actually damage my hardwood or premium floors?
Yes, and it’s one of the most overlooked risks of skipping robot vacuum maintenance.
A wheel packed with hair and grit drags that debris across your floor on every single pass, acting like fine sandpaper over months of repeated contact, which is what actually causes the light scuffing owners sometimes blame on the robot’s weight.
Separately, a worn or leaking mop system can leave standing water in floor seams, and excess moisture is well documented as a leading cause of warping and finish damage in wood flooring.
For example, engineered hardwood with even a slightly degraded finish can show visible dulling within a few months of regular contact with a debris-caked wheel, long before the damage would be obvious from a single pass.
If you have premium or engineered hardwood, inspect wheels and the mop system weekly rather than monthly.
Our recommendation: treat wheel and mop-system checks as floor-protection maintenance, not just vacuum maintenance, especially on any finish you’d be expensive or difficult to refinish.
How often should I replace robot vacuum filters, brushes, and rollers?
Non-washable HEPA filters typically need replacement every 2 to 3 months under normal use, and roughly monthly in a pet household or with daily runs.
Side brushes generally last 3 to 6 months before bristle wear noticeably reduces edge and corner pickup, and main rollers usually last 6 to 12 months depending on floor type and pet hair volume.
For example, a household running the robot daily on mostly hard floors with no pets might stretch a main roller past a year, while a daily-run pet household on mixed carpet and hardwood may need a new roller closer to the 6-month mark.
A quick way to check without guessing: if a freshly cleaned roller or brush still shows reduced pickup compared to when it was new, wear rather than dirt is the likely cause.
Our recommendation: log replacement dates when you install each part so you’re tracking actual usage instead of estimating from memory.
Can I wash a HEPA filter, or does it need to be replaced?
It depends entirely on whether your specific filter is labeled washable, and this is one of the most common mistakes in robot vacuum maintenance.
True HEPA filters rely on a dense mat of fine fibers to trap microscopic particles, and running water through a non-washable filter breaks down that fiber structure even though the filter looks visually clean afterward.
Some robot vacuum models do use a washable foam or mesh pre-filter stage that’s explicitly rated for rinsing, separate from the true HEPA stage, and only that pre-filter stage should touch water.
For example, rinsing a non-washable HEPA filter under a faucet can reduce its fine-particle capture rate significantly on a single wash, even without visible damage to the material.
Check your model’s manual for the word “washable” specifically before rinsing anything.
Our recommendation: when in doubt, replace rather than wash, since a compromised HEPA filter defeats the allergen-control purpose of running the vacuum in the first place.
How often should I empty a self-emptying dock’s dust bag?
Most self-emptying dock bags hold 30 to 60 days of debris under typical use, but that estimate shifts significantly with pet hair and household size.
Check the bag monthly regardless of the “full” indicator, since a partially clogged bag can silently cause transfer failures where the robot’s small bin appears to empty but debris isn’t fully reaching the larger bag.
For example, a pet household running two robot vacuums into a shared dock may need to change the bag every 3 to 4 weeks instead of the 6 to 8 weeks typical for a pet-free single-robot household.
A practical sign it’s time regardless of schedule: if you notice the transfer cycle running longer or louder than usual, treat that as an early warning rather than waiting for an explicit alert.
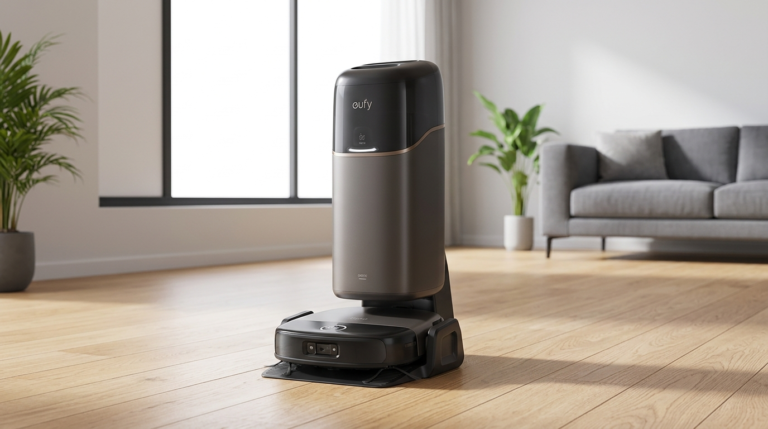
The eufy Omni S2, for example, rates its sealed bag for up to 68 days, but heavy-shedding households should budget for the shorter end of that range.
Our recommendation: set a monthly reminder to physically check the bag rather than relying solely on the app’s fullness indicator, which can lag behind actual capacity.
Why is my robot vacuum leaving streaks or spreading dirt instead of picking it up?
Streaking and spreading dirt instead of collecting it are almost always signs of a maintenance gap rather than a hardware failure.
The most common cause is a clogged or worn mop pad redistributing dirty water across the floor instead of lifting it, closely followed by a roller so caked with hair that it’s pushing debris aside rather than sweeping it into the bin.
A dirty water reservoir on a mopping model can also reintroduce grime with every pass, effectively mopping your floor with slightly dirty water.
For example, a mop pad that’s been reused for 3 to 4 sessions without rinsing will typically start smearing rather than lifting debris, especially on sealed hardwood.
Before assuming a hardware issue, work through the weekly and monthly steps above in order: clean the roller first, then the mop pad and reservoirs.
Our recommendation: if streaking continues after a full cleaning cycle, the mop pad itself is likely worn and due for replacement rather than just washing.
Does regular maintenance really extend a robot vacuum’s lifespan?
Industry sources commonly cite well-maintained robot vacuums lasting 5 or more years compared to roughly 2 years for neglected units, though this should be treated as a general rule of thumb rather than a verified statistic, since no standardized long-term study backs the exact figures.
What’s better supported is the mechanism: motors and batteries work harder when airflow is restricted by a dirty filter or tangled roller, and that added strain is a well-understood driver of premature component wear in small appliances generally.
Little-and-often maintenance beats occasional deep cleaning for both performance and floor protection, since it prevents the buildup that forces the motor to compensate in the first place.
For example, a robot running daily with consistent weekly and monthly maintenance is far less likely to need a mid-life battery or motor replacement than one running the same schedule with maintenance skipped for months at a time.
Our recommendation: treat the schedule in this guide as the floor, not the ceiling, for protecting your investment.
For more on protecting the floors themselves, see our guide to cleaning hardwood floors without damaging the finish, and if pet hair is your main challenge, our best robot vacuums for pet hair guide covers models built for exactly this maintenance profile.
Conclusion
A consistent robot vacuum maintenance routine is less about any single deep clean and more about not letting small things stack up.
Check our Floor Maintenance and Care Guides hub for more upkeep routines across your floor care equipment, and browse our robot vacuum buying guide if you’re weighing a new model that better fits your household’s maintenance needs.
If dander and allergens are a bigger concern than the vacuum itself, our best air purifiers for pet owners guide pairs well with the pet-owner profile above.
For more from EverydayHomeComfort, start at our home page.
For further reading, the U.S. Environmental Protection Agency’s guide to indoor air quality covers how inadequate cleaning equipment can redistribute allergens indoors.
The Asthma and Allergy Foundation of America offers detailed guidance on controlling indoor allergens, including pet dander.
A peer-reviewed research review on the National Institutes of Health’s PMC archive examines what actually works for minimizing indoor allergen exposure.
The International Electrotechnical Commission’s IEC 60312-1 standard defines how vacuum cleaning performance is formally measured, including the effects of filter and airflow condition.