Ad. When you purchase through links we provide, we may receive an affiliate commission. Here's how it works.
Robot Vacuum Filter Replacement: A Step-by-Step Guide
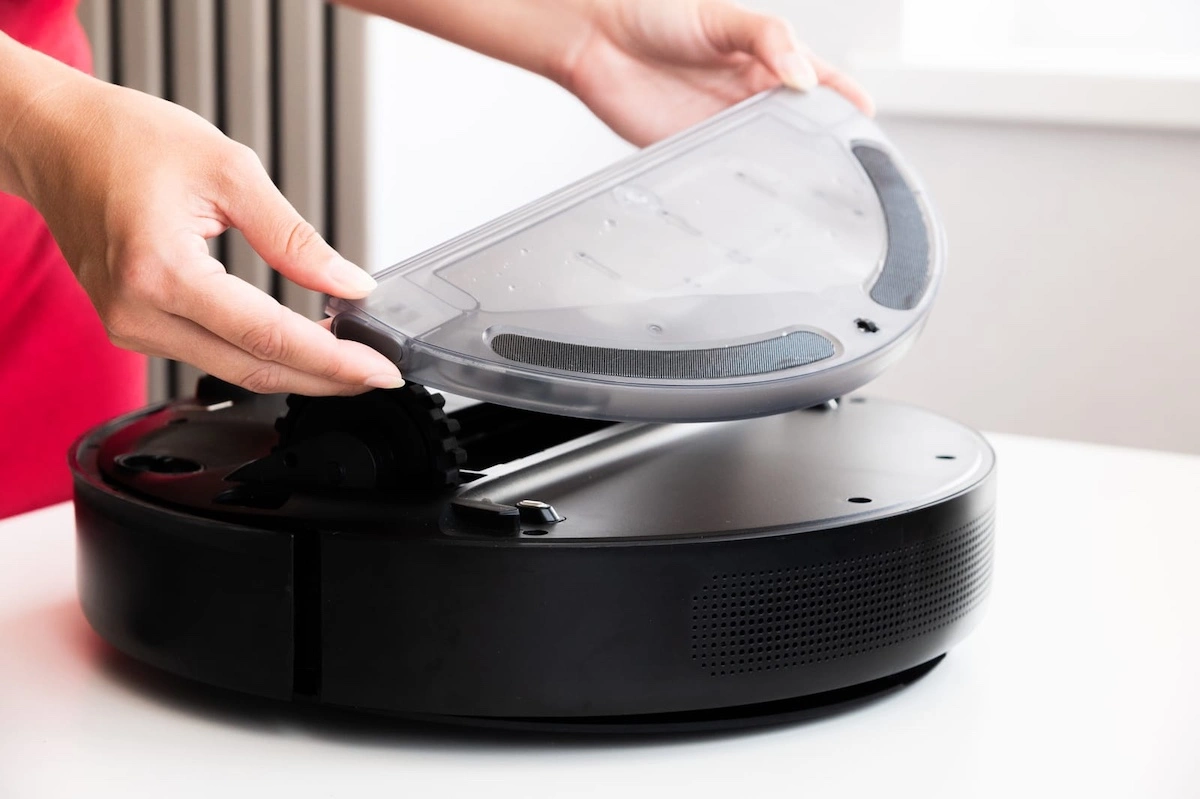
Notice your robot vacuum’s suction fading or a faint musty smell after a run? A worn-out filter is almost always the cause. Robot vacuum filter replacement is simple: pop out the dustbin, slide the filter free, tap out debris or rinse it if it’s washable, let it dry completely, and snap in a clean or new filter, typically every two to six months depending on your model (see intervals below). Skipping this reset cuts suction, strains the motor, and can send fine dust right back into the air you breathe.
What You’ll Need
Tools (required):
- Access to your robot vacuum’s dustbin and filter compartment (no extra tools needed on most models)
- A trash bag or bin for loose debris
- A soft brush or old toothbrush, for knocking dust out of foam or mesh filters
- A replacement filter matched to your exact model number, if you’re replacing rather than cleaning
Cleaning supplies (optional, washable filters only):
- Cool running water
- A dry, well-ventilated spot to air-dry the filter for the better part of a day
Optional:
- A second filter to rotate in while the first one air-dries, so the vacuum never sits idle
Step-by-Step Robot Vacuum Filter Replacement
Say your Roomba’s suction has been dropping all week, or your Roborock’s app just flagged a maintenance alert. You don’t need a repair visit, just about ten minutes and the steps below.
- Power down and unplug the base. Turn off the robot vacuum and disconnect it from its charging dock before opening any compartment, so the brush roll and exposed contacts can’t engage while your hands are inside.
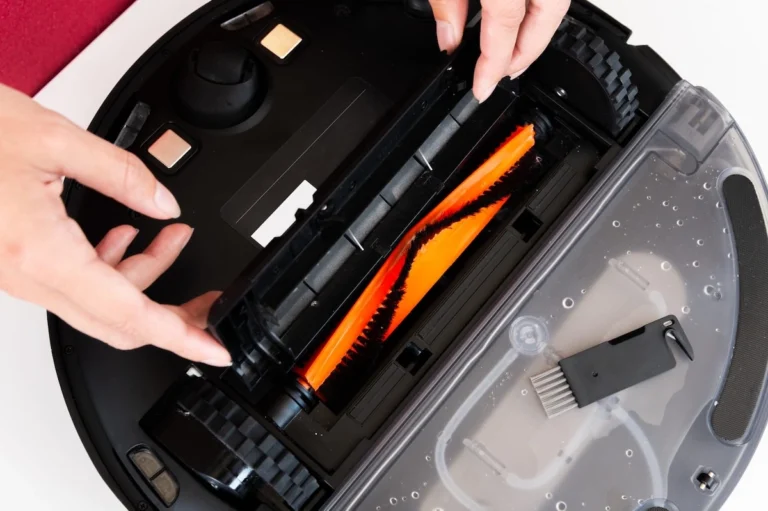
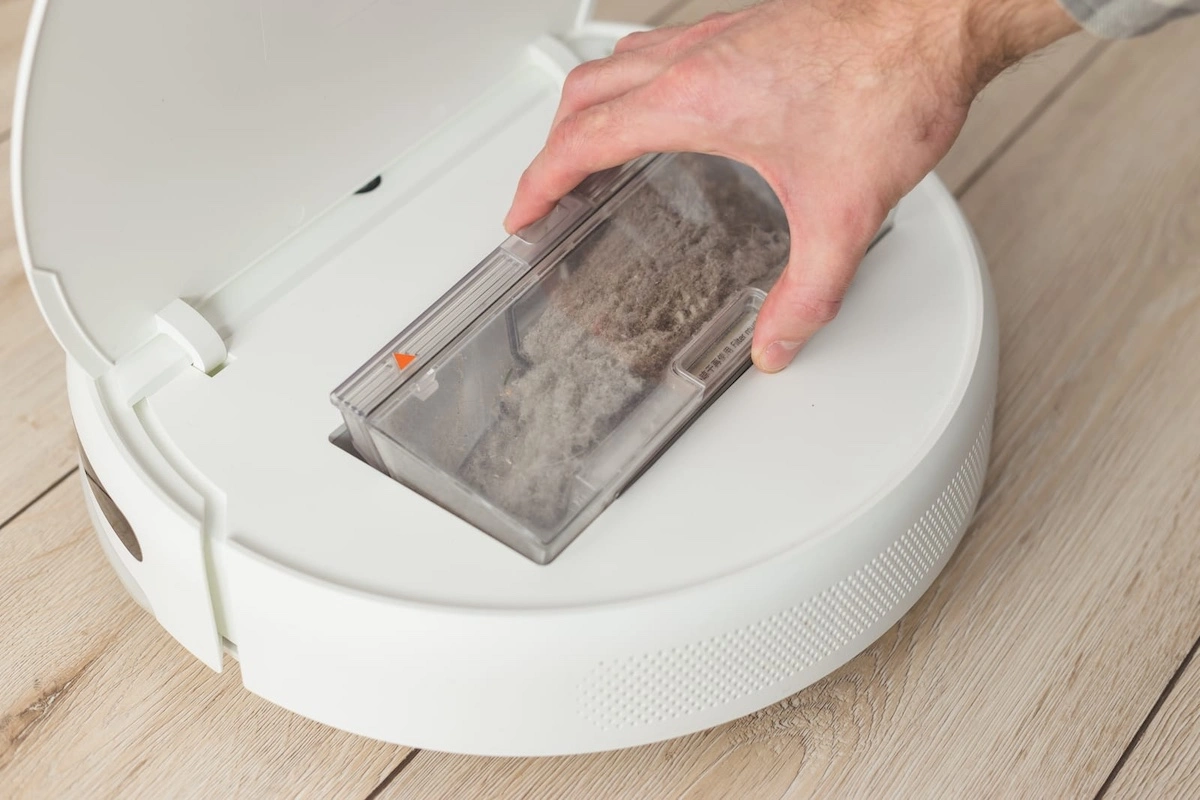
- Remove the dustbin. Most units release it with a single button press on top or after opening a rear panel. Empty debris into the trash first, since a full bin makes the filter harder to reach.
- Slide out the filter. It usually lifts out with a light, straight pull, no tools required. This is the step people rush, and rushing is how filters get bent or torn.
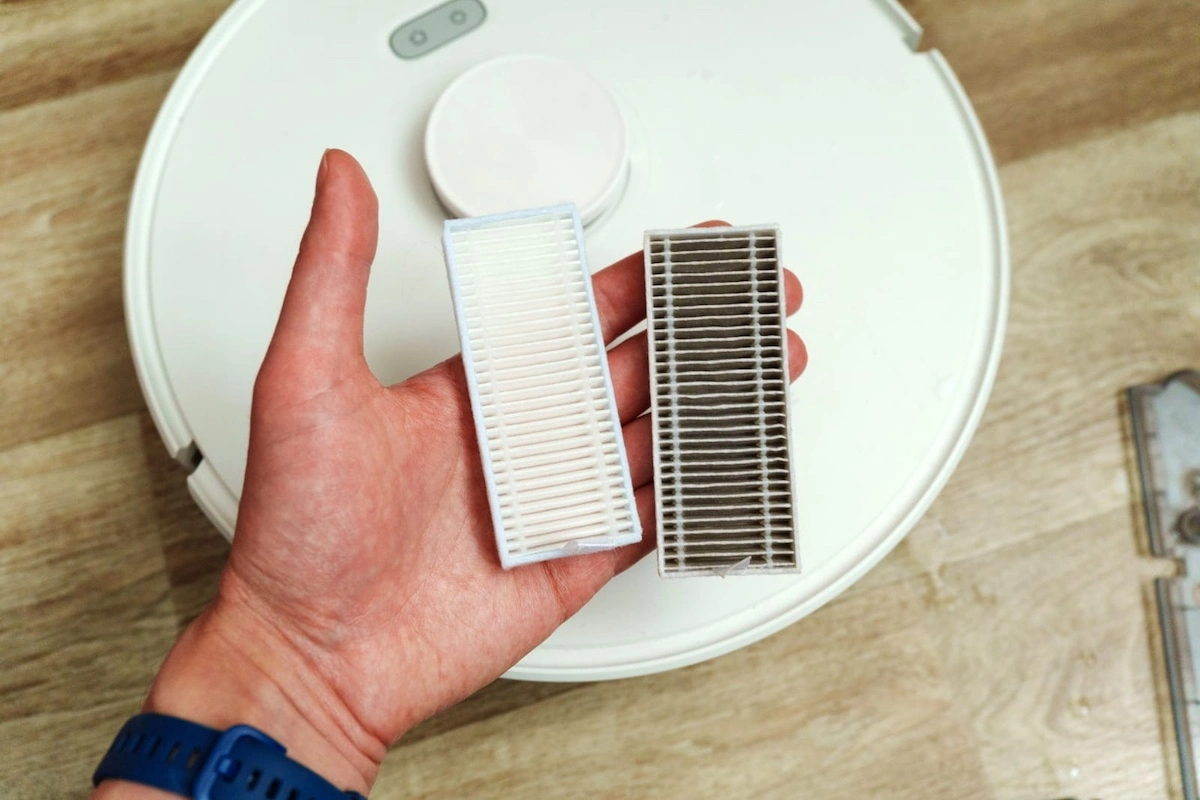
- Inspect it before deciding to clean or replace. Hold the filter up to a light: if you can’t see light through it, if it’s torn, or if it still smells musty after a rinse, it needs full robot vacuum filter replacement, not another cleaning cycle.
- Clean or discard based on filter type. Tap foam and mesh filters against a trash bin to knock out loose dust, then rinse under cool water only if your manual confirms the filter is washable. HEPA-rated media is generally not washable and must be replaced outright, since washing collapses the fine pleated fibers that trap particles.
- Dry it completely before reinstalling. As a safe rule of thumb, give washable filters a full 24 hours of air-drying with good airflow, away from direct heat that can warp the frame. A damp filter reinstalled too soon traps moisture against the motor housing, one of the fastest ways to grow mold inside the unit.
- Install the new or dried filter, then the dustbin. Line up the filter’s tabs with the housing slots and press until it seats flush, then reattach the dustbin the same way it came out. Run a quick spot-clean cycle to confirm suction is back to normal before a full run.
Why This Works
A clean filter is what lets your vacuum’s motor pull air efficiently past the debris it’s collecting. Once a filter clogs, the motor has to work harder to maintain the same airflow, which is what actually causes the suction drop you notice on carpets and pet hair. Regular robot vacuum filter replacement matters for more than suction, too: a degraded or torn filter lets fine dust and allergens pass straight back into the room instead of staying trapped, per the US EPA’s guidance on air cleaners and filters. Think of it like a coffee filter gone soft: it still looks like it’s working, but the fine grounds slip through anyway.
Common Mistakes to Avoid
- Waiting for total suction loss before starting robot vacuum filter replacement: by then the filter has likely been under-performing for weeks. Use the interval guidance below as your trigger, not your ears.
- Washing a filter labeled HEPA or “not washable”: one of the most common mix-ups owners make. Water collapses the pleated fiber structure that gives HEPA-rated filters their fine-particle capture, so once it’s wet, it’s done, not clean.
- Reinstalling before the filter is fully dry: trapped moisture invites mold and can trip a fault code on some models. Give it a full day to dry, no shortcuts.
- Buying a filter that doesn’t match your exact model number: a poor fit lets unfiltered air bypass it entirely, defeating the point of replacing it.
- Skipping the dustbin cleanout: a full bin puts pressure on the filter seal and lets debris fall back onto a filter you just cleaned.
Safety & Maintenance Tips
Safety:
- Always power down and disconnect from the charging dock before opening any compartment; some models keep the brush roll motor live while docked.
- Rinse filters with cool water only. Hot water and dish soap beyond a light rinse can break down foam filters faster and void the warranty on some models.
Maintenance:
- We recommend emptying the dustbin after every one to two runs if you have pets, since a full bin is the single biggest driver of early filter clogging.
- Keep a spare filter on hand once you know your model’s interval, so a wash-and-dry cycle never leaves the vacuum out of service.
- Wipe down the filter housing and seal with a dry cloth at each swap: trapped dust on the seal is a common reason a freshly cleaned filter still shows reduced suction.
Which Method Is Right for You?
- If you have a pet that sheds daily → cut the standard interval roughly in half; we recommend checking every four to six weeks instead of waiting out the two-to-six-month baseline, especially if you’re running one of our best robot vacuums for pet hair daily.
- If your filter is labeled HEPA or “non-washable” → skip rinsing entirely, treat every cleaning as a dry tap-and-inspect cycle, then replace it outright on schedule.
- If you’re short on time → keep a second filter on hand so you can swap immediately and clean the old one later.
- If the filter still smells musty after a full rinse and a day’s dry → replace it outright; the odor means moisture or bacteria is trapped in the fibers.
- If the app shows a maintenance alert but the filter still looks intact → clean it anyway, since most alerts are usage-hour estimates, not fault detection.
- If you run mainly on hardwood or other hard flooring → consistent suction matters most for lifting fine grit without scattering it, so don’t skip the check just because carpets show less wear; see our best robot vacuums for hardwood floors guide for models built to handle it well.
Robot Vacuum Filter Replacement by Brand
Filter type and pace vary by manufacturer; treat these as starting points and confirm the exact interval in your model’s manual.
- Roborock: foam and plastic-framed filters on most models, with maintenance guidance pointing to filter attention roughly every two months under normal use (manufacturer claim).
- Ecovacs: filter types range from foam to paper to HEPA by model, with a general three-to-six-month replacement window across the lineup (manufacturer claim).
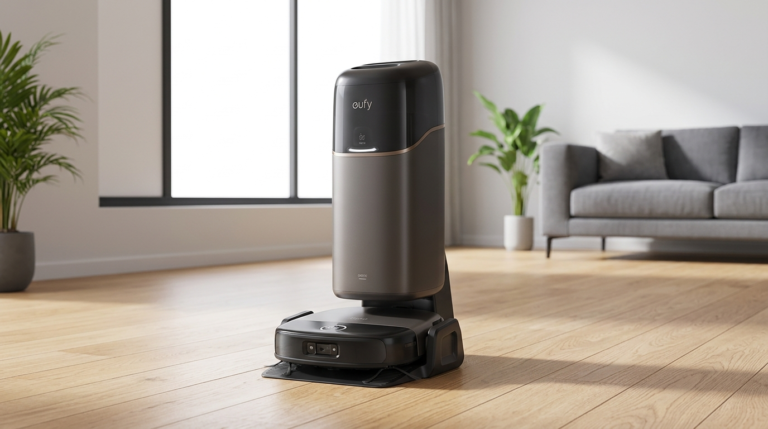
- Eufy: mostly HEPA-rated filters. No single fixed number is published; instead, weekly cleaning with replacement once a filter is clogged, torn, or still smells dusty after cleaning (manufacturer claim).
- iRobot (Roomba), Shark, SwitchBot, and Dreame: each publishes its own filter-care guidance in-app or in the manual, but the interval varies by series and filter type. Check your specific model’s manual rather than assuming a generic number applies.
Robot Vacuum Filter Replacement: Quick Recap
Robot vacuum filter replacement comes down to three habits: check the filter against your model’s two-to-six-month baseline (shorter if you have pets), replace it on a fixed schedule instead of waiting for suction loss, and never reinstall a filter that isn’t fully dry. Get those three right and your robot vacuum will hold its suction and keep pulling fine dust out of the air, not just off the floor.
How We Developed This Guide
We researched manufacturer maintenance documentation across major robot vacuum brands and cross-checked filtration terminology against the US EPA’s definition of HEPA filtration. Brand-specific intervals are traced to each manufacturer’s own documentation, and general guidance is marked as our own recommendation rather than a manufacturer claim. For our full method and scoring rubric, see our review methodology.
Frequently Asked Questions
How often should I replace my robot vacuum’s filter?
Most robot vacuum manufacturers recommend a general filter replacement window of two to six months (see the brand-specific intervals above), though the right interval depends on your model, filter type, and how much dust and pet hair your household produces.
Roborock’s own maintenance guidance calls for filter attention roughly every two months under normal use (manufacturer claim), while Ecovacs states a broader three-to-six-month range across its filter types (manufacturer claim). Households with shedding pets or multiple daily cleaning runs should treat the shorter end of that range as the default, since dust and hair accumulate on the pleats faster than the manufacturer’s baseline testing assumes.
If you’re unsure where your unit falls, check the filter monthly for the first few months and track how quickly it visibly clogs; that pattern is more reliable for your home than any single published number.
Can I wash a robot vacuum filter, or does it always need to be replaced?
Whether you can wash a robot vacuum filter depends entirely on the filter’s material, and using the wrong method on the wrong filter type is one of the most common mistakes owners make.
Foam and mesh pre-filters, found in many mid-range models, are typically rinseable under cool running water and can be reused several times before they need full replacement. True HEPA filters, by contrast, are built from tightly pleated fiber media that traps fine particles down to 0.3 microns at a 99.97% efficiency rate, a standard defined by the US EPA, and that pleated structure collapses when it gets wet, permanently reducing filtration performance even if it looks fine afterward. Always check your specific model’s manual before rinsing anything labeled HEPA.
As a working rule: if the manual doesn’t explicitly say “washable,” treat the filter as replace-only rather than risk a filter that looks clean but no longer filters properly.
What happens if I keep using a clogged robot vacuum filter?
A clogged filter forces your robot vacuum’s motor to work harder to pull the same volume of air through blocked pleats, and that extra strain is the direct cause of the suction drop you’ll notice on carpet and pet hair first.
Beyond weaker cleaning, a filter that’s past its useful life, torn, or otherwise compromised can start letting fine dust and allergens pass back into the room air instead of trapping them, working against the reason many households run a robot vacuum daily in the first place. A torn or visibly damaged filter can no longer trap fine dust and allergens, so it should be treated as an immediate robot vacuum filter replacement rather than another cleaning cycle. Sustained motor strain from restricted airflow can also shorten the motor’s lifespan, and a burning-dust smell during runs is a common warning sign.
If you notice reduced suction, a burning smell, or a visible tear, act right away rather than waiting for the next check.
How do I know if my robot vacuum filter is HEPA or just foam or mesh?
Check your robot vacuum’s manual or the filter’s own printed label first, since manufacturers disclose the filter type there rather than leaving it to guesswork.
Foam and mesh filters usually have a spongy, uniform texture you can see light through easily and often show visible dust caught on the surface rather than deep inside the material. HEPA filters look noticeably different: dense, tightly pleated paper-like fibers folded into ridges, designed to maximize surface area, which is what lets them meet the HEPA capture standard. Many current models use a two-stage system: a washable foam pre-filter that catches larger debris, plus a separate HEPA-rated final filter that should never be rinsed. If your unit has both, treat them differently: clean the foam stage as often as you like, and replace the HEPA stage on a fixed schedule.
Our HEPA vs. True HEPA guide breaks down the filtration-class differences in more detail if you want to go deeper on the terminology.
Do pet owners need to replace robot vacuum filters more often?
Yes, and the reason is mechanical, not just anecdotal: pet hair and dander clog filter pleats faster than household dust alone, because hair wraps around the fiber structure and fine dander particles pack into the same pores that trap dust, reducing airflow well before the manufacturer’s general-use interval is up.
A household running one shedding dog or cat through daily robot vacuum cycles will typically see visible clogging at roughly half the standard interval, which is why we recommend checking every four to six weeks rather than waiting for the two-to-six-month window described above. Signs to watch for include a filter that looks matted rather than dusty, a faster-than-usual return of pet odor, or the app flagging more frequent maintenance alerts. With multiple pets, keeping a second filter on hand so you can swap immediately keeps your cleaning schedule from stalling out.
Pairing a shorter filter interval with more frequent dustbin emptying, covered in our robot vacuum maintenance schedule, catches most pet-hair clogging before it affects suction.
Where should I buy a replacement filter for my robot vacuum?
The most reliable option is a filter that matches your exact model number, not just your brand, since filter dimensions and mounting tabs vary even across models from the same manufacturer, and a poor-fitting filter can leave gaps that let unfiltered air bypass it completely.
Check your model’s manual or the manufacturer’s support site for the exact part number before ordering anything, and keep that number saved so future robot vacuum filter replacement doesn’t require re-searching from scratch. Generic or third-party filters can work if they list compatibility with your model number, but an ill-fitting filter is one of the more common reasons owners report suction problems persisting even after a fresh swap. If you’re setting up a recurring routine, buying two filters at once lets you rotate a clean one in immediately while the other air-dries.
For model-specific buying guidance and comparisons across today’s top robot vacuums, see our robot vacuum buying guide.
Keep Your Whole Home Comfort System Running
A well-maintained filter keeps your robot vacuum performing the way it did on day one.
For more on keeping it running well, browse our Vacuum Cleaners category, or head back to the EverydayHomeComfort homepage.